
Deck Out Your Outdoor Kitchen in Madison, WI, with These 5 Features
Dining outdoors can be one of those things that you love to do at a restaurant, but you may not have given much thought to doing it at home. When you deck out a Madison, WI, outdoor kitchen with high-end appliances and unique features to maximize your enjoyment, you won’t need to go anywhere but your own backyard for a great dinner out.
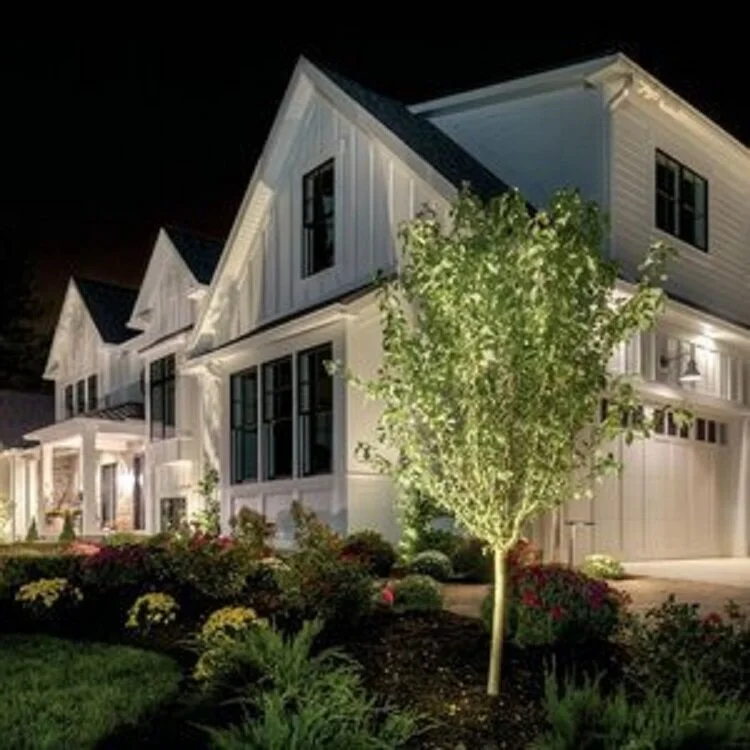
Landscape Design Ideas for Homes with a View in Madison, WI
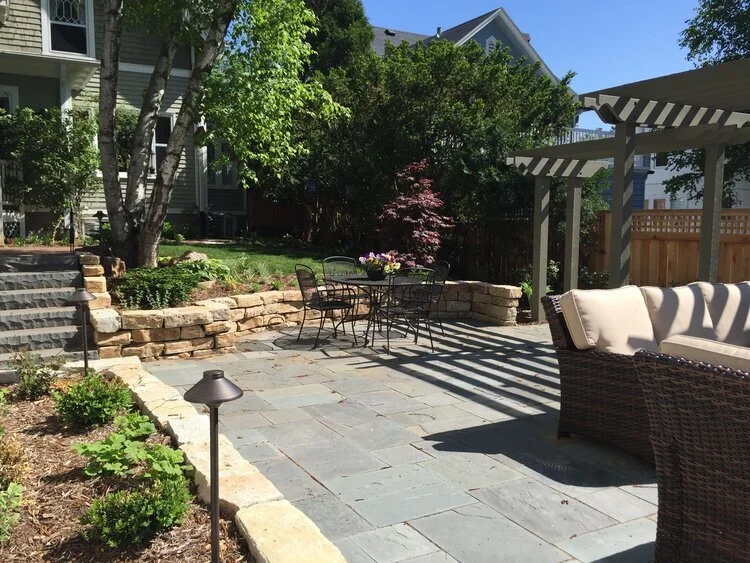
Patio Design and Outdoor Furniture Arrangement Ideas for Avid Outdoor Entertainers in Verona, WI

How Investing in Landscape Architecture Can Enhance Your Outdoor Living in Middleton, WI
When you think of your Middleton, WI, landscape, you might be tempted to assume that because it is part of nature there will be few problems. However, preparing the land correctly for activities that you want to enjoy can mean the difference between a fun outdoor barbeque and slogging through rain runoff to light the grill. This is where investing in landscape architecture can bring so many benefits to your outdoor space.
Creating an Outdoor Space: From Start to Finish
Last January I received a call from a potential customer requesting a new patio. As we met, he started describing an amazing outdoor space his friend has. He didn’t want anything as elaborate but he would like a built-in grill, a fire pit and a screened in gazebo to escape the mosquitos. What I thought to be a simple patio became a very special and fun project that has turned into one of my career favorites. My customer has gained an outdoor space they will enjoy for many years.

The project flowed as most do. I measured the property doing a complete site analysis. Then, I developed a contour plan showing all the existing grading information. Through this it became apparent that although the yard was large, 2+ acres, the area I had to work with was cut off by a swale that drained water around the house. Once you crossed the swale, there was a hill that climbed a seven or so feet before leveling off.
The challenge became, how do I meet the goals:
Create an outdoor kitchen.
Provide a patio with an eating area and a fire pit.
Develop a screened-in porch.
Without:
Disrupting water flow.
Without getting the patio or gazebo too far from the house that it became too inconvenient to use.
Before Picture:

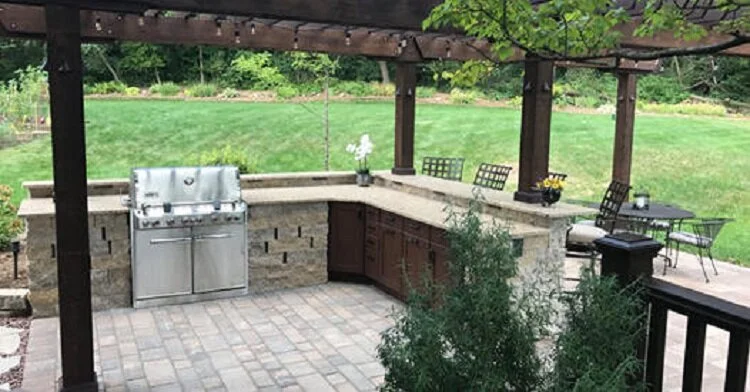
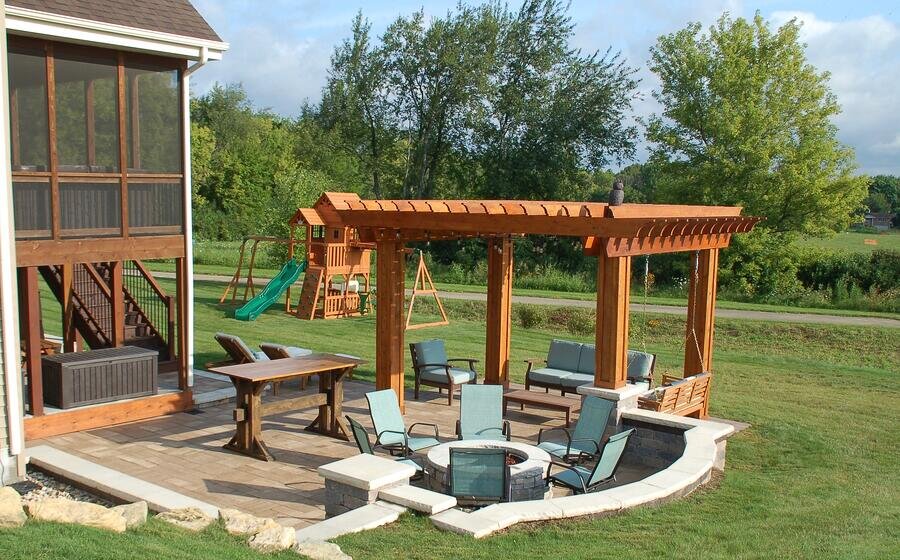
After Picture:

I was able to design a very nice space (as seen above) with all the customer’s request except the screen porch. I recommended a mosquito abatement system called the Nutone Haven mosquito repellant fixture. This caused some leeriness from my customer to give up the screen porch, but they did. In the end, it completely paid off, they were very happy with end project and it is mosquito free.

The final design included a built-in grill along with outdoor cabinets by NatureKast™. We built walls to define and support the structure using cut natural stone. The back wall is built taller acting as a backsplash and providing the ability for raised bar seating. The counter tops are Tahoe Suede granite.

This project is located just outside of Madison, Wisconsin so it is not used in the winter. A specific request by the customer was to avoid amenities requiring winter maintenance such as a refrigerator or a sink. One of the NatureKast™ cabinets houses a Yeti cooler so that food or drinks can stay cold outside avoiding the cost and maintenance of a refrigerator.
The grill is a Weber Summit S-670 built in natural gas. It is set into the natural cut stone wall. The wall provides a 24” combustible free material surround per the manufacturers specification.The stone was set with spaces to allow venting, again per manufacturer’s specification, to allow the release of natural gas if a leak develops.
The paving is all manufactured by Unilock. In the kitchen area we used Artline with an IL Campo finish. In order to avoid awkward elevation changes to provide for drainage and to maintain level lines along the cabinet structure and the deck steps, we set the Artline with space between the pavers to allow for permeability. We used Unilock’s Easy Pro permeable polymeric sand in the joints.
The remaining patio spaces are paved with Bristol Valley pavers with a soldier course of IL Campo to create continuity with the IL Campo finished Artline in the kitchen area.The fire pit has a 24” band of Courtstone pavers to provide a “warning track” around it.
There is large pergola, which covers the outdoor kitchen area and extends to cover the outdoor eating area. In order for the pergola to be long enough to cover both the kitchen and eating area, a wooden detail was designed to serve as a connector of the two supporting beams. The pergola is nearly 30 feet long requiring 6 posts (2 in the center). For an added festive touch, we added LED bistro lights that drape across the beams.

One of the biggest design challenges was the "snow ball" effect of minor changes to the layout. For every small change in the kitchen, the pergola had to shrink or stretch to so the center pergola posts would land in the raised bar counter. The center pergola posts not only support the pergola but also the cantilivered raised bar counter.

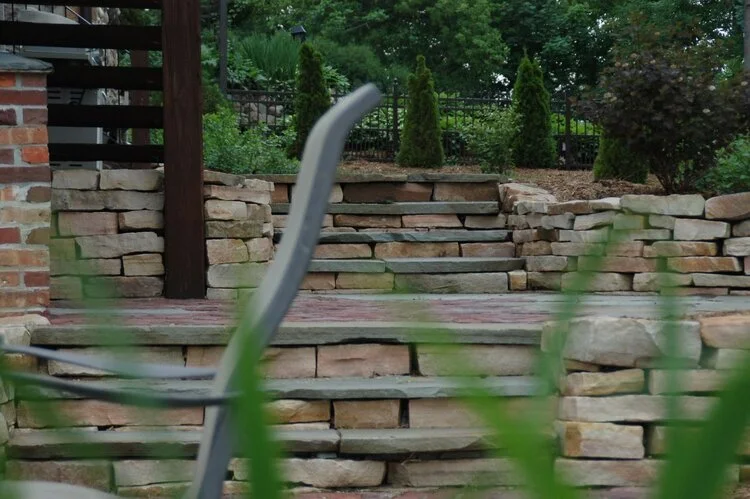
The fire pit area extended out far enough that we needed to reroute the swale. The area is defined by a seating wall constructed by the same cut natural stone used to build the kitchen. The wall is 18” tall on the patio side but 30” tall on the swale side so it along with natural stone outcroppings function as retaining wall as well. The fire pit is natural gas using an insert by Fire Gear and capped using English Mitered Autumn Sky Stone. The paving immediately around the fire pit is Unilock Courtstone.

To create different textures in the various walls, we set each wall a little differently. The seating/retaining wall was set with the stone ends split providing a subtle textural change. The stones on the columns at the end of each wall have cut ends so the stones fit tightly together making a much more refined look. The stone in the kitchen is also set with cut ends to duplicate the refinement. The fire pit stone is set with the natural stone ends and a slight space between. This was done to create rougher look with some additional shadowing but more importantly to provide venting in case of a gas leak.
The completed project is one of my career favorites for many reasons. First, the customers were special people. They stayed involved throughout the project. I saw them daily during the construction. They would even set coffee out for my crew daily and sometimes doughnuts too. I got to know them well. The design was challenging and had many elements that had to be brought together in a relatively small space. My employees did a tremendous job organizing and implementing the plans. We were able to meet our customer’s goals with a high-quality project. What I enjoy most in my job is watching the transformation in a yard and witnessing my customer’s realization of their project and knowing they will enjoy it for years to come.
Pergolas: Planning, Designing and Implementing
As the popularity of outdoor rooms and spaces have grown so have pergolas. I have built several for my clients. Pergolas are a great way to make the space more comfortable as the posts and open ceiling provide just enough structure to make a large space more quaint. They do a great job at creating a ceiling and the perception of walls really do become the defining element of a space. I also love how pergolas can be personalized.
What is a Pergola?
A pergola is a garden structure consisting of posts that support beams and rafters. Some pergolas have trellising on the sides to provide privacy while others have more substantial roofs to keep rain out.

Pergola vs. Arbor
Often people think that pergolas and arbors as synonyms. I generally think of a pergola as a larger structure that can provide a seating area underneath whereas an arbor is more a covered gateway that you can walk through. Both can provide structure for grape vines, climbing roses and hydrangea or other vines.
Why a Pergola?
Most of my clients request a pergola to offer shade or because they like the look. I believe a pergola has several other benefits and purposes:
It helps define a space and create a more finished outdoor room.
Provides a different way to grow plants
Adding plants such as vines, hanging plants, pots and cascading plants can make your pergola unique to your space
Here are a few great plants for your pergola.

Fun and festive
You can add lighting such as bistro lights or add banners to create a festive atmosphere.
Your pergola can transform with the seasons do with you. Think holiday lights or a place for Halloween decorating.

Shade
If you want a space to sit with filtered sun
Provide shade over a grilling area
Provide shade on a counter so your food won't sit in the sun
Privacy
From above. If you have a neighbor with an upstairs window looking down over your patio, a pergola can block their view of you.
You can add panels or lattice to the wall to create a fence like privacy without fencing in your yard.

Adds value to your property
Pergolas add value and is less expensive than a gazebo or screen porch. You can make the space virtually mosquito free with a mosquito abatement system such as Nutone Haven Mosquito fixtures.
HGTV agrees with me when I say that a pergola adds value to your space.
According to this article, for every $1,000 spent, you can expect a $3,000 in your return investment
It is important to note that a pergola accompanies an entire outdoor space. That space can include an outdoor kitchen, patio or deck.

What does a Pergola Cost?
In the Madison, Wisconsin market most pergolas we build cost between $4,000 and $12,000. A smaller simple pergola over a grill will be on the lower end. While a larger more complex pergola will be more. We sand and stain most of the pergolas we build but some customers opt to do this themselves. Adding trellising, ceiling fans or other amenities increase cost as well.
Pergolas are a great at defining a space and creating a comfortable space you want to be in. They can accompany any designed space. Our pergolas are all custom made so that they fit your needs and space. If you have any questions, please contact me.
Plant Bed Edging
Plant bed edging is one topic that I am often asked about. Many of my clients come to me seeking advice on how to really define their lawn and plants. There are several options that are available, and each has their advantages and disadvantages.
What is plant edging?
It essentially is a permanent material that separates the plant bed from the lawn. Most commonly, bed edging is seen as black vinyl or plastic. I have a lot of customers ask me: “Is this my only choice?” But before I answer that question, we need to answer why you would use bed edging.

Why should you edge your plant bed?
Plant bed edging helps reduce maintenance for your yard. It reduces the spread of grass into the plant beds. It also prevents erosion of bark, mulch and other materials into your grass. As a result, many of my customers opt to do some sort of edging mainly to prevent the need for maintenance.

Do you need to use a permanent edge between the lawn and the plant bed?
Frankly, I do not use a permanent bed edging in my yard. I trench with a spade to provide a nice clean edge. It does increase maintenance some but I believe it places the focus on the colors and textures of the plants in the garden. The landscape design is important when deciding on the right way to edge your plant bed. This article I wrote will help explain more about balancing your landscape planting design and what works best for your needs.
What are the options?
As I mentioned earlier, the black vinyl edging is the most frequent solution. It is the least expensive of the options and quick to install. When installed correctly black vinyl edging will stay in place for 10-20 years.
While it is an easy solution, there are some disadvantages.
It is easy to install incorrectly which will lead to frost heaving during the freeze-thaw cycles of spring.
It is easily clipped with a lawnmower or a string trimmer.
It can trap water behind it if there is minimal change in elevation or if it set too high.
Typical cost of black vinyl edging installed by a professional landscape contractor will be between $3.50 and $4.15 per linear foot.
Other options include:
Stone or Brick
Advantages
Less likely to heave in the winter.
Won’t be damaged by mower.
Can provide a nice, clean look without detracting from plants.
Can create a more forward look.
Easy to run mower tire on.
Disadvantages
More difficult to install.
Can cost $10-20 per liner foot.

Concrete Curbing
Advantages
Creates a strongly defined edge
Makes a visual statement
Disadvantages
The focus becomes the edging instead of the plants.
Cost over $30 per foot.
It can be difficult to decide what option is best for your lawn and plant beds. If you have any questions or need advice on these options, please leave a comment below.